Our May hostess, Denise, of There’s a Newf in My Soup!, challenged The Daring Cooks to make Gumbo! She provided us with all the recipes we’d need, from creole spices, homemade stock, and Louisiana white rice, to Drew’s Chicken & Smoked Sausage Gumbo and Seafood Gumbo from My New Orleans: The Cookbook, by John Besh.

This month’s challenge was all about the wonderful world of gumbo. Our hostess gave a great (and very thorough) lesson on all the components that go into making a traditional gumbo, and challenged us to prepare our own pot, using one of the provided recipes, a variation thereof, or any other gumbo recipe that might tickle our fancy. We were also encouraged to make our own stock and Creole Spice Blend. I wasn’t ambitious enough to make my own stock, but I did throw together my own spice blend based off of the one I found on Chow.

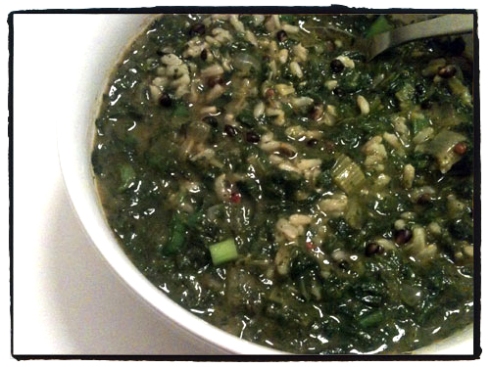
In addition to the two main gumbo recipes provided (Chicken & Smoked Sausage and Seafood), our hostess provided a link to a vegetarian Gumbo Z’herbes recipe. This is the recipe I opted for. While it may not look very attractive (and I know, the terrible cell phone picture doesn’t help its case), it definitely did not disappoint. It is a powerhouse of flavor with fragrant spices and delectable greens. My husband and I both enjoyed it, and I think it will be a recipe that I keep around for a long time to come.

Renata of Testado, Provado & Aprovado! was our Daring Cooks’ April 2011 hostess. Renata challenged us to think “outside the plate” and create our own edible containers! Prizes are being awarded to the most creative edible container and filling, so vote on your favorite from April 17th to May 16th at http://thedaringkitchen.com!

Ugh. You would think that by now I would remember when the posting date is for these challenges, but apparently I don’t have a clue. I was thinking it was tomorrow, when it was in fact yesterday. Sigh.

Well, posting mishaps aside, I have to say I really enjoyed this month’s challenge. We were challenged to make a savory edible container. Our host provided several ideas along with a link to a fantastic edible container round-up article she had written. We could choose any recipe provided or create something totally new as long as it was a container that was edible and had suitable content.

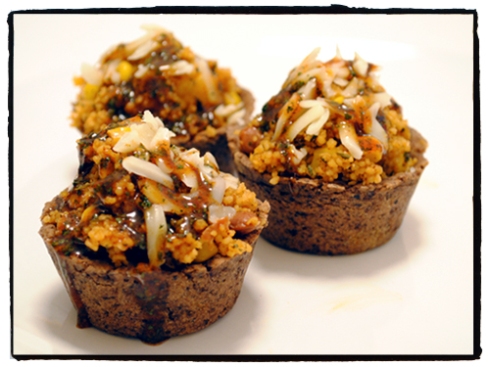
I played around with some different ideas, but the stand-out winner for me where these black bean cups. I got the recipe from Cake, Batter, and Bowl. My only adaption was to bake the cups in a regular sized muffin tin rather than a mini one. This will yield about 7  bean cups. If using a regular sized muffin tin, just place about 2 tablespoons of dough into each muffin cup and spread the dough up the side of each cup (I found that pressing the bottom of my tablespoon measure into the dough helped create nice, fairly uniform sized cups). Then bake the bean cups at 350ºF for 18-20 minutes or until set. Cool completely.

For the filling I used the Mexican Couscous Power Bowl recipe found at Healthy. Happy. Life. I just adapted it to what I had on hand and decreased the amount of beans since I would be serving them in the bean cups. She provides a recipe for an optional Gave-Rika ‘dressing’ for the dish, and I would highly recommend you go ahead and make it to serve over the bean cups. To me, it really brought the whole dish together. One more note, the couscous dish makes a lot, so if you are making it to serve in the bean cups you may want to halve the recipe or just be prepared to have leftover filling to munch on for lunch the next day – which of course, isn’t an entirely bad thing.

Yeasted Meringue Coffee Cake

The March 2011 Daring Baker’s Challenge was hosted by Ria of Ria’s Collection and Jamie of Life’s a Feast. Ria and Jamie challenged The Daring Bakers to bake a yeasted Meringue Coffee Cake.

This month’s challenge was an adventure in yeasted dough. For this yeasted meringue coffee cake, a brioche-like dough is rolled jellyroll style around a whipped meringue and flavorful filling. The dough is then carefully shaped into a wreath and baked. While baking, the true magic happens – the meringue melts into the dough and creates a perfectly tender and superbly moist cake.

The only mandatory item was that we make the sweet yeast dough for the coffee cake and the meringue. The additional filling ingredients were left open to the creativity of each individual baker.

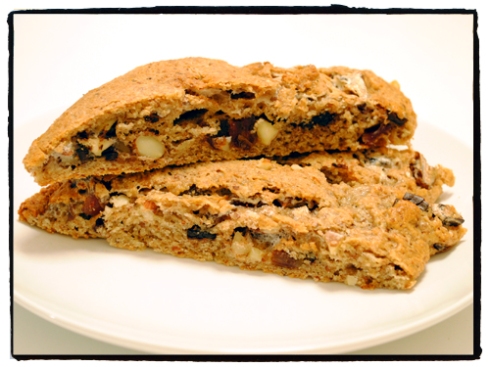
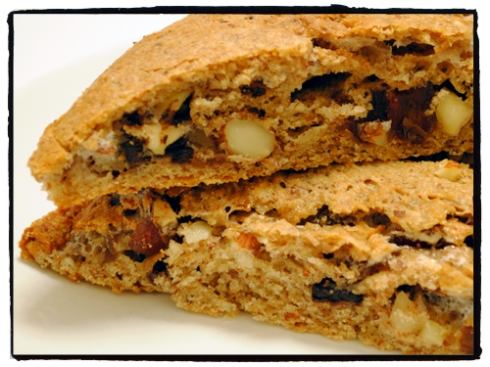
I’ve really tried to make a commitment to baking with only whole grains this year, so I altered the recipe to reflect this choice. I’ve also been challenging myself to use up ingredients I already have on hand rather than going out and buying all new stuff, so after going through the pantry, freezer, and fridge I decided on a dough made with a mixture of spelt flour and almond meal and a filling comprised of chopped almonds, dates, cinnamon, and dark chocolate chunks.

With ingredients in hand, I set to work on the coffee cake and everything was going great up until the rolling of the dough. As I rolled the dough, meringue began oozing out all over my workspace. I tried wiping and cleaning up as much meringue as I could so that I could properly seal the jelly roll, but it was quite a mess! Then I started to try and shape the wreath but with all the meringue everywhere and a lumpy jellyroll of dough I decided the wreath was a lost cause, so I just shaped the jellyroll into a loaf by pinching up the ends of the dough. I also didn’t really get much rise out of the second rise time, and that could be due to any number of reasons (not giving it enough time, a really humid kitchen, the whole grains, other substitutions, plain ol’ bad mojo…) – so basically, my loaf was a bit flat and squatty. I was feeling really disheartened as I put the misshapen loaf in the oven and even considered just throwing it out in frustration, but I figured I had already come to far to throw in the towel. With that, I put the loaf in the oven and crossed my fingers that it would at least be edible.

Coffee Cake Close-Up

Well, I’m happy to report that this recipe did not disappoint. Even with all my various snafus, the coffee cake emerged from the oven tender, moist, and utterly delicious. I was actually a little embarrassed to serve it, so I sliced it up before putting it on the table and then grudgingly showed my husband a picture of what it was supposed to look like. After tasting it he declared that he would rather it taste as good as it did then it be the perfect shape, so my confidence was restored and we proceeded to eat half the loaf! This is some seriously good stuff! I definitely want to try the recipe again and try to correct the mistakes I made this time.

You can download a printable PDF of the challenge recipe right here.

Kathlyn of Bake Like a Ninja was our Daring Cooks’ March 2011 hostess. Kathlyn challenges us to make two classic Peruvian dishes: Ceviche de Pescado from “Peruvian Cooking – Basic Recipes” by Annik Franco Barreau. And Papas Rellenas adapted from a home recipe by Kathlyn’s Spanish teacher, Mayra.

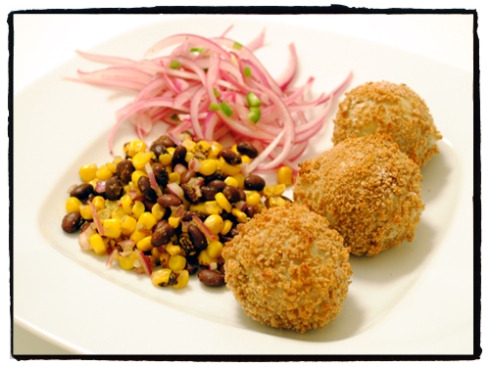
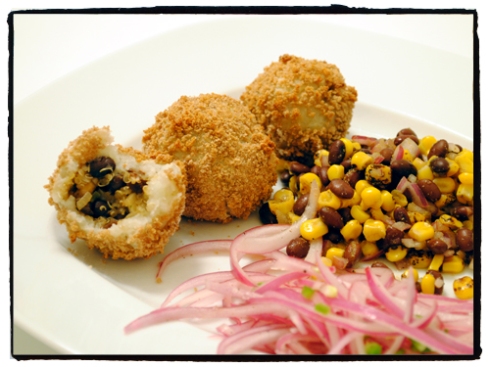
This month’s challenge provided the Daring Cooks the opportunity to dish up some exciting Peruvian cuisine. The first option was to try our hand at making ceviche. Ceviche is typically made with fresh fish or seafood that is marinated in citrus juices. The citric acid in the juice “cooks” the fish – either partially or completely, depending on how long it is marinated. The second option was to create papas rellenas. This traditional Peruvian dish is comprised of a potato “dough” that is stuffed with a filling (usually made with beef) and then deep fried. The dish is also usually accompanied with a “salsa criolla.”

For the challenge we had to make at least one of the aforementioned Peruvian dishes. Always a fan of the carbs, I opted to make the papas rellenas. For the filling I used a vegetarian recipe that was provided by our hostess. The recipe for the vegetarian filling was really wonderful, and would be great just served as a dish on its own. I also chose not to fry my papas rellenas and baked them instead. I was really nervous about having to bread all of these little potato balls; breading and I have not always meshed (use the tempura challenge as a case in point). I usually end up with globs of gooey breading on my plate and fingers, so this time around I read up on some breading techniques, and I’m happy to report that they worked brilliantly. I am now a breading master (at least more so that I was before this challenge). I do have to admit, these little guys are truly a labor of love. It took me a very long time to stuff, shape, and bread all of the dough balls, so if you plan on making these be sure to allot yourself plenty of time. In the end though, I have to say they were definitely worth it. I loved the crunchy outer texture, and as our host recommended, they are definitely best served with the salsa criolla.

This challenge certainly provided a great introduction to Peruvian cuisine, and I hope to have the opportunity explore some more Peruvian dishes in the near future.

You can view the recipes used after the jump. Read the rest of this entry »

The February 2011 Daring Bakers’ challenge was hosted by Mallory from A Sofa in the Kitchen. She chose to challenge everyone to make Panna Cotta from a Giada De Laurentiis recipe and Nestle Florentine Cookies.

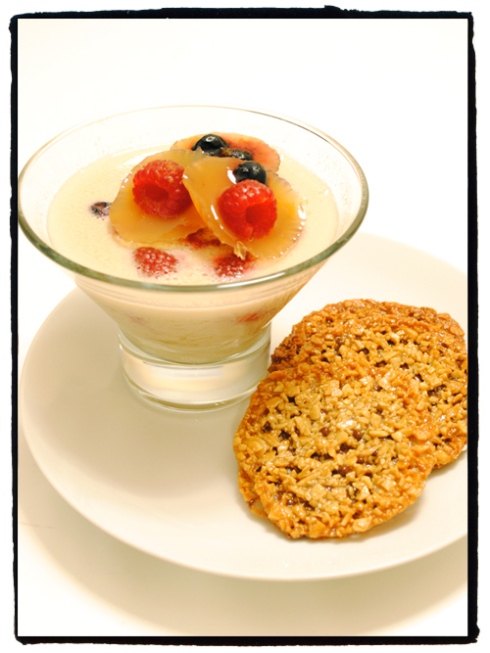
February was a whirlwind of month with lots of baking projects going on, and while I actually completed this challenge a few days before the deadline I got a case of Oscar fever and completely forgot about posting until now. This month’s challenge was to make a creamy Panna Cotta along with a batch of Florentine Cookies. Our host gave us recipes for a vanilla and chocolate Panna Cotta. We were encouraged to play around with these base recipes and challenged to get creative with how we garnished them. I wanted to do a vegan version, so I set out to find a recipe that would work with what ingredients I had on hand. I got super stoked when I saw a recipe for a soy milk Panna Cotta in the Great Chefs Cook Vegan cookbook. I don’t usually keep soy milk around, so I used what I had on hand, which in this case was hemp milk. The reason this is important to note, is that while the recipe for the panna cotta set up nicely and tasted good, there was a little bit of an issue with how it looked. I’m not sure what happened, but it looked like the hemp milk had separated so there was a bit of a “cloudy” look to the final Panna Cotta. I don’t know if this occurred due to the particular brand of hemp milk I used or the fact that it wasn’t soy or something else entirely (perhaps liquid from the fresh fruit?), but it was a little disappointing to say the least. The Florentine recipe I used however was excellent, and they came out quite tasty. For the decorations I chose to make little agar agar fruit jellies inspired by Nature Insider. These turned out awesome and were quite the hit at the dinner table.

Since I’m late and pressed for time, I’m just going to provide the links to the recipes I used along with any alterations I may have made.

Soy Milk Panna Cotta from Great Chefs Cook Vegan
As previously mentioned, I used hemp milk in place of the soy milk. I also used 2 teaspoons of pure vanilla extract instead of the vanilla bean. I threw in some fresh fruit into the glass before pouring in the Panna Cotta, and I would probably omit that next time. I figured they would sink, but some stayed right up at the top and just didn’t look all that attractive.

Florentine Cookies from Strawberry Pepper
I omitted the orange zest and used whole wheat flour in place of the all-purpose. I also chose to use the chocolate to sandwich the cookies together, rather than drizzle it on top.

Fruit Jellies from Nature Insider
Instead of water, I made a half batch (which is more than you need) of the vanilla muscat sauce included with the Panna Cotta recipe and used that as the liquid. I did not add any additional sweetener, but if I were to do it again I would definitely add some. Granted, I neglected to taste the sauce before adding the agar-agar, but once they were set they were not very sweet at all.

It still needs some work, but maybe one day it will turn into something a little more visually appealing.

If you are interested in the original challenge recipes you can download them in a printable PDF here.

The February 2011 Daring Cooks’ challenge was hosted by Lisa of Blueberry Girl. She challenged Daring Cooks to make Hiyashi Soba and Tempura. She has various sources for her challenge including japanesefood.about.com, pinkbites.com, and itsybitsyfoodies.com.

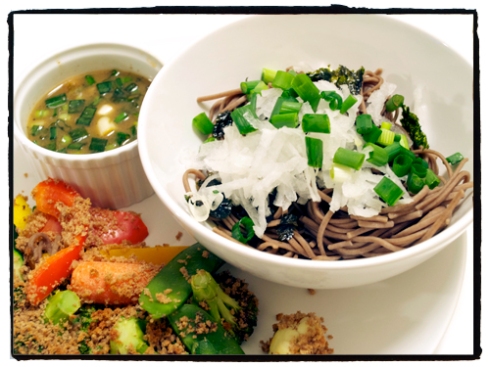
This month’s challenge was super exciting because I love, and I do mean loooove, eating Japanese food! So when I saw soba noodles and tempura were on the menu I was through the roof. For this challenge we were to make Hiyashi Soba, a popular soba noodle salad reserved primarily for summer. Soba noodles are a thin Japanese noodle made from buckwheat flour. They are usually served cold with a dipping sauce (as in this dish), or in a hot broth as a noodle soup (which is how I’ve normally had them up until this challenge). We were also challenged to make tempura. Tempura is a Japanese dish of seafood or vegetables that have been battered and deep fried. A light batter is made of cold water (sometimes sparkling water is used to keep the batter light and soft) and wheat flour (cake, pastry or all-purpose flour). Eggs, baking soda or baking powder, starch, oil, and/or spices may also be added. I don’t do any deep frying in my kitchen, so I opted for a baked version of the tempura. While still tasty (and a whole let healthier), it really doesn’t hold a candle to the traditional deep fried version.

I must say that after this challenge I have completely fallen in love with cold soba noodles, and the provided spicy dipping sauce recipe is definitely a keeper! I love the fresh flavors and simplicity of this dish, and can definitely see a lot more Hiyashi Soba on the menu come summer!

You can get the recipes and learn how to serve Hiyashi Soba after the jump.

Read the rest of this entry »

The January 2011 Daring Bakers’ challenge was hosted by Astheroshe of the blog accro. She chose to challenge everyone to make a Biscuit Joconde Imprime to wrap around an Entremets dessert.

For this month’s challenge we were challenged to make a biscuit joconde imprime that would be cut and fit into a dessert mold for a completed entremets. Are you totally lost? Because I know I was! So let’s go over some vocabulary:

A joconde imprime (French Baking term) is a decorative design baked into a light sponge cake providing an elegant finish to desserts/torts/entremets formed in ring molds. A joconde batter is used because it bakes into a moist, flexible cake. The cake batter may be tinted or marbleized for a further decorative effect.

This joconde requires attentive baking so that it remains flexible to easily conform to the molds. If under baked it will stick to the baking mat. If over baked it will dry out and crack. Once cooled, the sponge may be cut into strips to line any shape ring mold.

Entremets (French baking term) is an ornate dessert with many different layers of cake and pastry creams in a mold, usually served cold.

For this challenge the joconde imprime would be the outside cake wrapper of the completed entremets dessert.

Once I got my brain wrapped around the vocabulary, I went into full-on panic mode. I was still recovering from a holiday baking overload, and this challenge was looking pretty out of my league. I seriously almost threw in the towel before I even began. I just didn’t think I had it in in me, but I didn’t really want to start off the new year skipping out on a challenge, so I let it sit for a few days and then reread the challenge. The more I went over the steps (and after watching a few videos of the process) it slowly started to look a bit less daunting.

I began scouring the internet looking for entremets that featured a decorated joconde sponge. For this challenge we were to decorate the joconde sponge using a provided décor paste recipe. I had my heart sent on a vegan version of this challenge and got really hung up on the fact that the décor paste recipe included so many egg whites. I really had no idea how to sub for the egg whites, and I was having no luck finding an already existing veganized décor paste recipe. Then I stumbled upon an image of a joconde sponge decorated with preserves. I got super excited and decided that even though it wasn’t sticking to the original challenge recipe it would still result in a decorated joconde, and I would be ok with that. I decided on raspberry preserves and bouncing off of that decided to go with a raspberry/lemon cheesecake type entremets. There were a number of vegan joconde recipes on the internet thanks to when the Daring Bakers took on Opera Cakes.

From what I could find, in order to decorate the sponge with preserves one would just pipe the preserves into a pattern on top of the sponge batter and then bake. Simple enough. Only problem was that while the sponge was baking the preserves started to sink into the batter, resulting in less than clean lines. I really did love the flavor of the preserves in the sponge, so I am curious if anyone out there knows of a better way to decorate sponge in this manner. It is definitely something I would like to master.
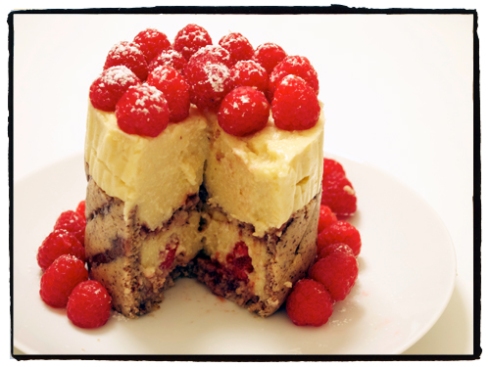
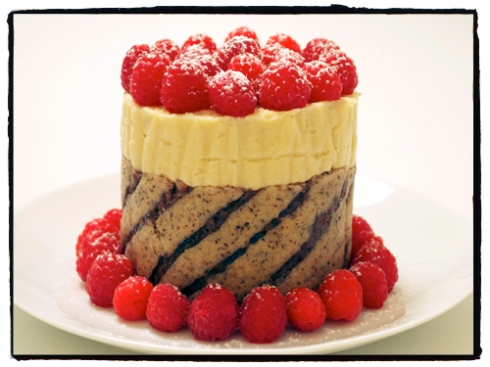
To assemble the entremets I had to build a make-shift mold out of a cardboard cereal box. It actually worked surprisingly well, although I lined the inside with parchment paper and the moisture from the entremets filling made it get all wrinkly (can you tell I really wanted some pristine lines and smooth edges for this thing?). For the base I used leftover joconde sponge and layered that with some more raspberry preserves. I topped the preserves with a layer of the lemon filling along with some fresh raspberries. Then threw in another layer of joconde sponge with preserves and the rest of filling. Topped it all off with some fresh raspberries and powdered sugar and voila – a super impressive looking dessert!

Despite it’s less than perfect appearance, I did really love this dessert. And in the end, it was not all that hard to put together. In fact, because I had leftover filling, and I was feeling guilty about not veganizing the décor paste, I made another quick one the next day!
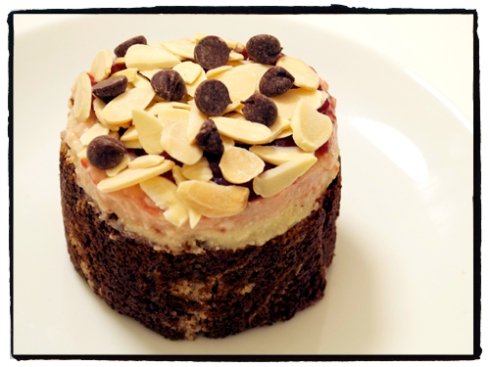
I had read someone mention decorating the joconde sponge by tinting a portion of the joconde batter and piping that onto the bottom of their baking pan and freezing. They then poured the un-tinted batter over the frozen tinted batter and placed the pan back in the freezer before baking. I tried this approach by tinting my batter with cocoa powder, and it actually seemed to work. I did two different designs and unfortunately totally broke the joconde with the cool pattern on it. Thus, I was left with my failed homemade pastry comb attempt, which really didn’t have much of a pattern.
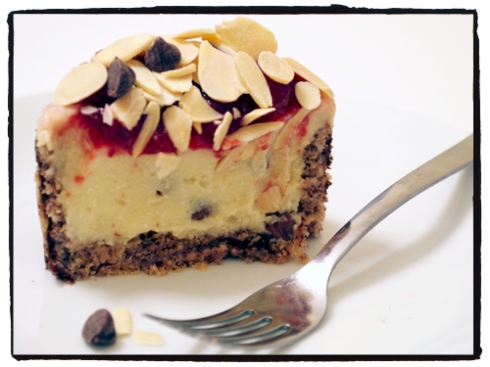
Since I used cocoa for the joconde I decided to add a few tablespoons of chocolate chips to about 3/4 of the leftover lemon filling and then added some raspberry preserves to the leftover 1/4 of the filling. I layered those in the mold and then topped with more preserves, some toasted almonds, and chocolate chips.

And just to show you the other sponge that broke:
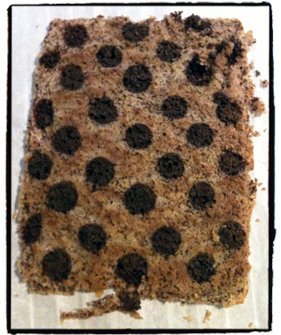
You can view the recipes and how to assemble the dessert after the jump. Please bear in mind that a lot of this was experimentation and could certainly use more tinkering to get the decorated joconde just right.

Read the rest of this entry »
Vegetarian Cassoulet

Our January 2011 Challenge comes from Jenni of The Gingered Whisk and Lisa from Parsley, Sage, Desserts and Line Drives. They have challenged the Daring Cooks to learn how to make a confit and use it within the traditional French dish of Cassoulet. They have chosen a traditional recipe from Anthony Bourdain and Michael Ruhlman.

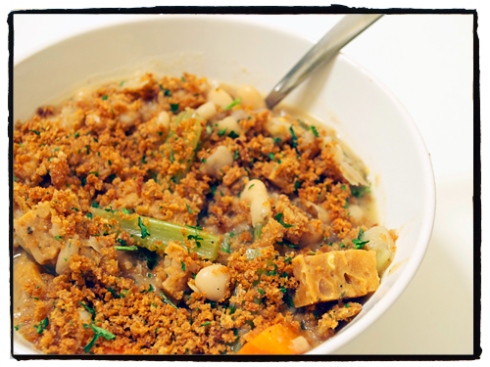
While a cassoulet isn’t totally new to me, I was pretty shocked to see the sheer amount of work that goes into a traditional cassoulet recipe. A traditional cassoulet recipe will typically contain pork, sausages, and white beans as well as a duck or goose confit and a nice topping of fried bread crumbs or cracklings and – get this – can take up to three days to prepare! I have made a couple of “cassoulets” in my day, but they have been nowhere near as labor intensive as this – I’m talking 30 minutes to prepare tops!

A confit on the other hand, was totally new to me. I have seen the term on menus, but never actually really knew what it was. Turns out it’s actually one of the oldest ways to preserve food. A confit is basically any kind of food that has been immersed in any kind of fat for both flavor and preservation. When stored in a cool place, confit can last for several months. Typically meats (most often waterfowl) are preserved in fats, while fruits are preserved in sugar.

For this challenge we had to make a confit and incorporate it into a cassoulet. We could choose any combination of meat or protein source that we wished, and we were encouraged to soak our own beans. There was an added challenge to make our own sausages as well. Three cassoulet recipes were provided: a traditional recipe, a vegetarian recipe, and a quick 30-minute cassoulet recipe. There were also various meat and vegetable confit recipes provided. I opted for the vegetarian cassoulet recipe along with a provided recipe for garlic confit.

The garlic confit came together rather easily. Most of it is really down time while it cooks in the oven. I only did half a recipe though – I couldn’t imagine having 65 garlic cloves sitting around in my fridge! I wasn’t really sure how to incorporate the confit into the cassoulet, so I just used it anywhere the recipe called for garlic or olive oil.

Since the challenge had been thrown out there to make our own sausages I decided I would also try to make the seitan sausage recipe that had been provided as part of December’s poaching challenge. I have only made seitan once before, and that was a baked recipe, so I was looking forward to trying out this method of poached seitan. It was certainly a bit of a process and where the bulk of my time was spent in this recipe. My sausage shaping skills are definitely lacking, and sadly they were no replacement for those tasty Field Roast sausages. In fact, they were rather bland. My husband and I both felt like they could’ve benefited from the addition of a little more salt and that might reflect a poor choice on my part in using a low sodium broth for my poaching liquid.

I also feel like my cassoulet was a little less than stellar. I’m not sure where I went wrong here because everyone had been saying great things about this recipe. Admittedly, I did have to replace the leeks in the cassoulet with onions because the two places I shop were out of the leeks that were called for, but I’m not sure if that would’ve made that much of a difference as far as flavor. Maybe it was a bad choice to use the garlic confit in place of the raw garlic in the recipe? Despite its drawbacks, I did like how the cassoulet recipe called for mashing a portion of the beans for a thicker broth; I really enjoyed that thicker consistency of this cassoulet from previous ones that I had made.

You can view all of the recipes used after the jump.

Read the rest of this entry »
Poached Egg

Jenn and Jill have challenged The Daring Cooks to learn to perfect the technique of poaching an egg. They chose Eggs Benedict recipe from Alton Brown, Oeufs en Meurette from Cooking with Wine by Anne Willan, and Homemade Sundried Tomato & Pine Nut Seitan Sausages (poached) courtesy of Trudy of Veggie num num.

So I was a little apprehensive when I saw this month’s challenge. First, I am not much of an egg eater so there was that hurdle to overcome. Second, I was plagued with flashbacks from Julia & Julia when Julie went through almost an entire carton of eggs trying to poach them for a recipe. My nerves were getting the better of me. Luckily, the holidays have been keeping my crazy busy, so I couldn’t obsess too much about all the in’s and out’s of poaching eggs and really just stuck to the advice from our hostesses and dove right in.

Amazingly, I didn’t have to go through a whole box of eggs to get three poached eggs. There were actually no real issues at all. I don’t know if they were the most beautiful poached eggs ever created, but they tasted good so I was happy. Chalk it up to beginner’s luck or some really good advice from our hostesses. but the process of poaching eggs was not nearly as frightening as I had been imagining it to be.

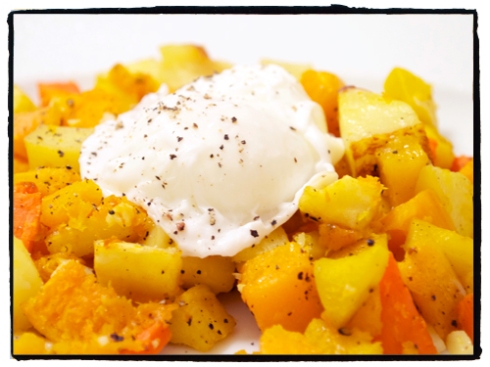
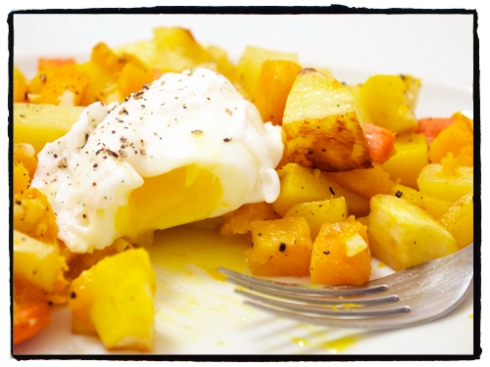
For the challenge we were provided with two recipes, but we were also given the option to use another recipe of our choosing, as long as it involved the technique of poaching. I settled on a Root Vegetable Hash with Poached Eggs and Parsley Pesto recipe that I found on Epicurious. Let me just tell you, this recipe is out of this world!

Poached Egg

Now, you may be looking at these pictures scratching your head and wondering where the pesto is. Rightly so. Unfortunately, in my rush to get some pictures taken before the meal got cold, I completely forgot to dress the plates with the pesto. Then I was so consumed by what an awesome meal I was eating, and I totally forgot about the pesto until we were halfway through the meal. Doh! But, that just goes to show that with or without the pesto it was still an amazing dish! The pesto not only added an additional depth of flavor, but also provided a much needed pop of festive color on this otherwise monotone plate.

Cranberry & Walnut Crostata

The 2010 November Daring Bakers’ challenge was hosted by Simona from briciole. She chose to challenge Daring Bakers’ to make pasta frolla for a crostata. She used her own experience as a source, as well as information from Pellegrino Artusi’s Science in the Kitchen and the Art of Eating Well.

This month’s challenge was to make an Italian dessert known as crostata (tart). The base of a crostata is made of pasta frolla, a sweet short crust pastry made of flour, sugar, butter, and eggs. A crostata can be filled with any number of fillings including fruit preserves, pastry cream, ricotta, and fresh fruit. For this challenge we were provided with two pasta frolla recipes to choose from for the base layer of the crostata. As for the filling, that was left entirely up to the bakers.

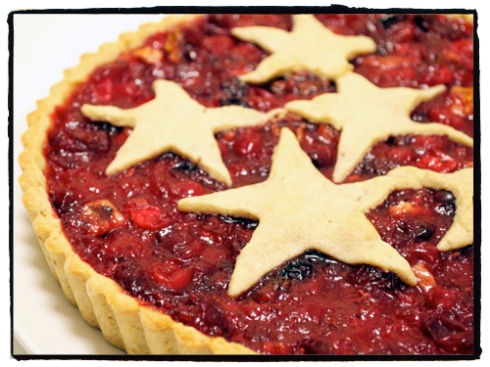
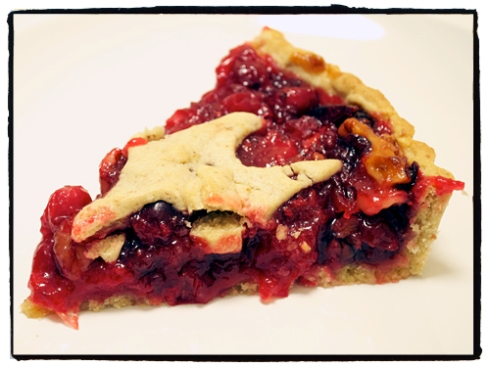
I was not familiar with crostatas at all before this challenge, so I spent some time reading up on some different recipes to get ideas for various fillings. I’ve been suffering a bit from “holiday fever” as of late, so when I stumbled upon this Crostata di Natale (Christmas Tart Recipe), I knew I had found my filling. The pasta frolla recipe I chose (Version 2 of the ones provided) worked up very nicely, and I was ecstatic to learn Simona’s little trick of rolling out the dough on plastic wrap (you can then fairly easily flip the dough over the tart pan and then gently peel away the plastic wrap) – worked like a dream! And speaking of rolling out dough, I think I may have finally started to get a handle on the secret to this essential baking skill thanks to another of Simone’s tips regarding working with firm dough – I finally achieved rolled dough that looked like the shape it was supposed to! The finished crostata was excellent. The pasta frolla crust had a great flavor and texture due to the addition of almond meal, and the filling was pleasantly balanced between tartness and sweetness – a perfect treat to start off the holiday season!

Slice of Crostata

You can view the recipes and instructions for assembling after the jump.

Read the rest of this entry »

Enter your email address to subscribe to this blog and receive notifications of new posts by email.

Join 6 other subscribers