You are currently browsing the tag archive for the ‘Daring Bakers’ tag.
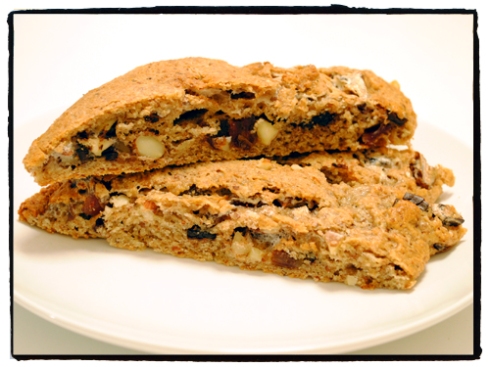
The March 2011 Daring Baker’s Challenge was hosted by Ria of Ria’s Collection and Jamie of Life’s a Feast. Ria and Jamie challenged The Daring Bakers to bake a yeasted Meringue Coffee Cake.
This month’s challenge was an adventure in yeasted dough. For this yeasted meringue coffee cake, a brioche-like dough is rolled jellyroll style around a whipped meringue and flavorful filling. The dough is then carefully shaped into a wreath and baked. While baking, the true magic happens – the meringue melts into the dough and creates a perfectly tender and superbly moist cake.
The only mandatory item was that we make the sweet yeast dough for the coffee cake and the meringue. The additional filling ingredients were left open to the creativity of each individual baker.
I’ve really tried to make a commitment to baking with only whole grains this year, so I altered the recipe to reflect this choice. I’ve also been challenging myself to use up ingredients I already have on hand rather than going out and buying all new stuff, so after going through the pantry, freezer, and fridge I decided on a dough made with a mixture of spelt flour and almond meal and a filling comprised of chopped almonds, dates, cinnamon, and dark chocolate chunks.
With ingredients in hand, I set to work on the coffee cake and everything was going great up until the rolling of the dough. As I rolled the dough, meringue began oozing out all over my workspace. I tried wiping and cleaning up as much meringue as I could so that I could properly seal the jelly roll, but it was quite a mess! Then I started to try and shape the wreath but with all the meringue everywhere and a lumpy jellyroll of dough I decided the wreath was a lost cause, so I just shaped the jellyroll into a loaf by pinching up the ends of the dough. I also didn’t really get much rise out of the second rise time, and that could be due to any number of reasons (not giving it enough time, a really humid kitchen, the whole grains, other substitutions, plain ol’ bad mojo…) – so basically, my loaf was a bit flat and squatty. I was feeling really disheartened as I put the misshapen loaf in the oven and even considered just throwing it out in frustration, but I figured I had already come to far to throw in the towel. With that, I put the loaf in the oven and crossed my fingers that it would at least be edible.
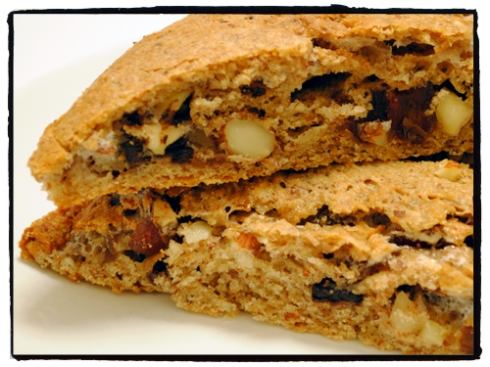
Well, I’m happy to report that this recipe did not disappoint. Even with all my various snafus, the coffee cake emerged from the oven tender, moist, and utterly delicious. I was actually a little embarrassed to serve it, so I sliced it up before putting it on the table and then grudgingly showed my husband a picture of what it was supposed to look like. After tasting it he declared that he would rather it taste as good as it did then it be the perfect shape, so my confidence was restored and we proceeded to eat half the loaf! This is some seriously good stuff! I definitely want to try the recipe again and try to correct the mistakes I made this time.
You can download a printable PDF of the challenge recipe right here.
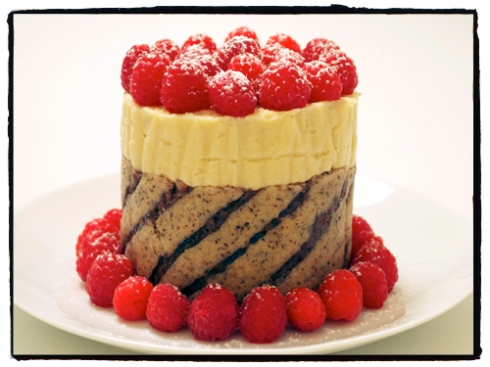
The January 2011 Daring Bakers’ challenge was hosted by Astheroshe of the blog accro. She chose to challenge everyone to make a Biscuit Joconde Imprime to wrap around an Entremets dessert.
For this month’s challenge we were challenged to make a biscuit joconde imprime that would be cut and fit into a dessert mold for a completed entremets. Are you totally lost? Because I know I was! So let’s go over some vocabulary:
A joconde imprime (French Baking term) is a decorative design baked into a light sponge cake providing an elegant finish to desserts/torts/entremets formed in ring molds. A joconde batter is used because it bakes into a moist, flexible cake. The cake batter may be tinted or marbleized for a further decorative effect.
This joconde requires attentive baking so that it remains flexible to easily conform to the molds. If under baked it will stick to the baking mat. If over baked it will dry out and crack. Once cooled, the sponge may be cut into strips to line any shape ring mold.
Entremets (French baking term) is an ornate dessert with many different layers of cake and pastry creams in a mold, usually served cold.
For this challenge the joconde imprime would be the outside cake wrapper of the completed entremets dessert.
Once I got my brain wrapped around the vocabulary, I went into full-on panic mode. I was still recovering from a holiday baking overload, and this challenge was looking pretty out of my league. I seriously almost threw in the towel before I even began. I just didn’t think I had it in in me, but I didn’t really want to start off the new year skipping out on a challenge, so I let it sit for a few days and then reread the challenge. The more I went over the steps (and after watching a few videos of the process) it slowly started to look a bit less daunting.
I began scouring the internet looking for entremets that featured a decorated joconde sponge. For this challenge we were to decorate the joconde sponge using a provided décor paste recipe. I had my heart sent on a vegan version of this challenge and got really hung up on the fact that the décor paste recipe included so many egg whites. I really had no idea how to sub for the egg whites, and I was having no luck finding an already existing veganized décor paste recipe. Then I stumbled upon an image of a joconde sponge decorated with preserves. I got super excited and decided that even though it wasn’t sticking to the original challenge recipe it would still result in a decorated joconde, and I would be ok with that. I decided on raspberry preserves and bouncing off of that decided to go with a raspberry/lemon cheesecake type entremets. There were a number of vegan joconde recipes on the internet thanks to when the Daring Bakers took on Opera Cakes.
From what I could find, in order to decorate the sponge with preserves one would just pipe the preserves into a pattern on top of the sponge batter and then bake. Simple enough. Only problem was that while the sponge was baking the preserves started to sink into the batter, resulting in less than clean lines. I really did love the flavor of the preserves in the sponge, so I am curious if anyone out there knows of a better way to decorate sponge in this manner. It is definitely something I would like to master.
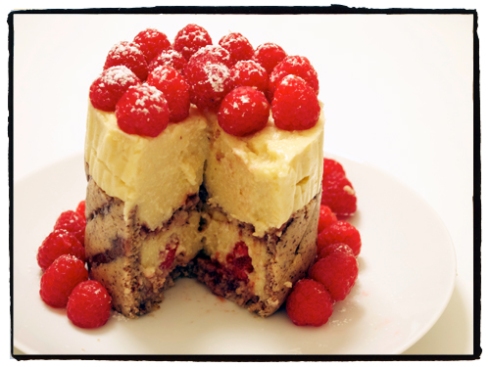
To assemble the entremets I had to build a make-shift mold out of a cardboard cereal box. It actually worked surprisingly well, although I lined the inside with parchment paper and the moisture from the entremets filling made it get all wrinkly (can you tell I really wanted some pristine lines and smooth edges for this thing?). For the base I used leftover joconde sponge and layered that with some more raspberry preserves. I topped the preserves with a layer of the lemon filling along with some fresh raspberries. Then threw in another layer of joconde sponge with preserves and the rest of filling. Topped it all off with some fresh raspberries and powdered sugar and voila – a super impressive looking dessert!
Despite it’s less than perfect appearance, I did really love this dessert. And in the end, it was not all that hard to put together. In fact, because I had leftover filling, and I was feeling guilty about not veganizing the décor paste, I made another quick one the next day!
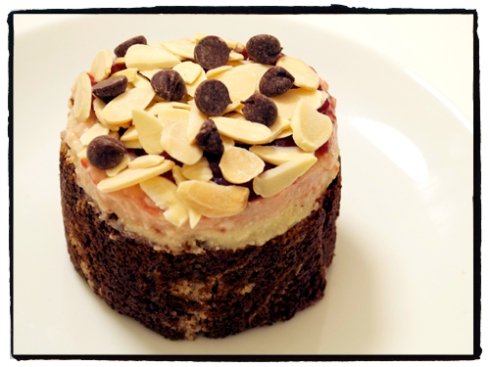
I had read someone mention decorating the joconde sponge by tinting a portion of the joconde batter and piping that onto the bottom of their baking pan and freezing. They then poured the un-tinted batter over the frozen tinted batter and placed the pan back in the freezer before baking. I tried this approach by tinting my batter with cocoa powder, and it actually seemed to work. I did two different designs and unfortunately totally broke the joconde with the cool pattern on it. Thus, I was left with my failed homemade pastry comb attempt, which really didn’t have much of a pattern.
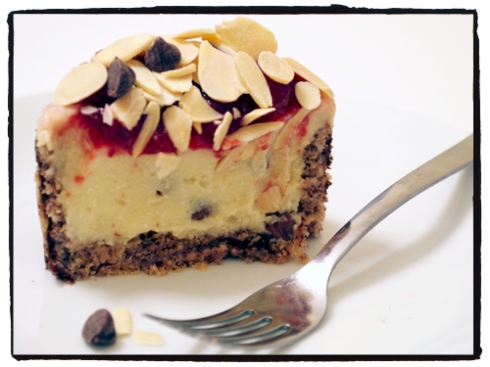
Since I used cocoa for the joconde I decided to add a few tablespoons of chocolate chips to about 3/4 of the leftover lemon filling and then added some raspberry preserves to the leftover 1/4 of the filling. I layered those in the mold and then topped with more preserves, some toasted almonds, and chocolate chips.
And just to show you the other sponge that broke:
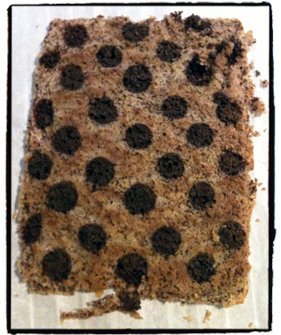
You can view the recipes and how to assemble the dessert after the jump. Please bear in mind that a lot of this was experimentation and could certainly use more tinkering to get the decorated joconde just right.
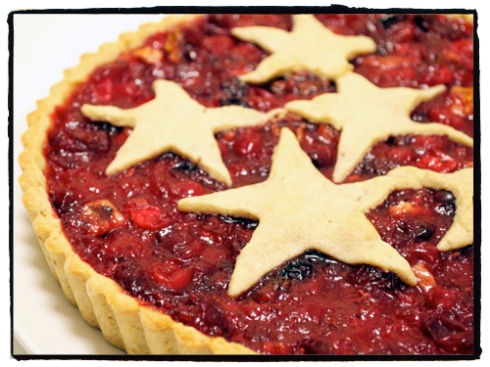
The 2010 November Daring Bakers’ challenge was hosted by Simona from briciole. She chose to challenge Daring Bakers’ to make pasta frolla for a crostata. She used her own experience as a source, as well as information from Pellegrino Artusi’s Science in the Kitchen and the Art of Eating Well.
This month’s challenge was to make an Italian dessert known as crostata (tart). The base of a crostata is made of pasta frolla, a sweet short crust pastry made of flour, sugar, butter, and eggs. A crostata can be filled with any number of fillings including fruit preserves, pastry cream, ricotta, and fresh fruit. For this challenge we were provided with two pasta frolla recipes to choose from for the base layer of the crostata. As for the filling, that was left entirely up to the bakers.
I was not familiar with crostatas at all before this challenge, so I spent some time reading up on some different recipes to get ideas for various fillings. I’ve been suffering a bit from “holiday fever” as of late, so when I stumbled upon this Crostata di Natale (Christmas Tart Recipe), I knew I had found my filling. The pasta frolla recipe I chose (Version 2 of the ones provided) worked up very nicely, and I was ecstatic to learn Simona’s little trick of rolling out the dough on plastic wrap (you can then fairly easily flip the dough over the tart pan and then gently peel away the plastic wrap) – worked like a dream! And speaking of rolling out dough, I think I may have finally started to get a handle on the secret to this essential baking skill thanks to another of Simone’s tips regarding working with firm dough – I finally achieved rolled dough that looked like the shape it was supposed to! The finished crostata was excellent. The pasta frolla crust had a great flavor and texture due to the addition of almond meal, and the filling was pleasantly balanced between tartness and sweetness – a perfect treat to start off the holiday season!
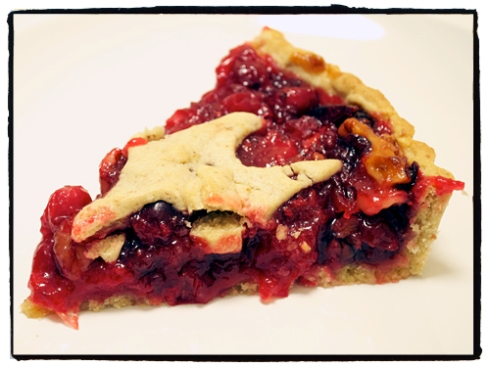
You can view the recipes and instructions for assembling after the jump.

The October 2010 Daring Bakers challenge was hosted by Lori of Butter Me Up. Lori chose to challenge DBers to make doughnuts. She used several sources for her recipes including Alton Brown, Nancy Silverton, Kate Neumann and Epicurious.
I love a good homemade doughnut, so it should be no surprise that I was super stoked to take on this month’s doughnut challenge. Lori was pretty generous with the challenge requirements – asking that we simply make doughnuts! 2 cake and 2 yeast doughnut recipes were provided and the sky was the limit as to how we might want to tweak these recipes – fillings, toppings, shapes, and sizes were all up to the bakers.
Since I still haven’t acquired a doughnut pan, I decided that I would go the yeast doughnut route. I also knew that I would want to be baking these bad boys rather than frying them. Me + hot frying oil = not fun times. I settled on adapting the Baked Doughnuts recipe from Heidi Swanson’s 101 Cookbooks. I halved the initial recipe and veganized it with great results.
I opted for three different glazes (Pumpkin Pie Spice, Southern Comfort, and Apple Cider) and attempted my first filled doughnuts. For the doughnut filling I combined about 2/3c vanilla pudding with 1/3 c pumpkin butter and piped it into the doughnuts – I am telling you, that filling was off the charts! I seriously considered just bypassing piping it into the doughnuts and piping it straight into my mouth. The only things I would change for the future would be to make my glazes a little thicker and to try to show some self-restraint and allow the doughnuts to cool a little bit longer before dunking them into the glazes and devouring.
You can view the adapted doughnut recipe plus the glaze recipes after the jump.

The July 2010 Daring Bakers’ challenge was hosted by Sunita of Sunita’s world- life and food. Sunita challenged everyone to make an ice-cream filled Swiss roll that’s then used to make a bombe with hot fudge. Her recipe is based on an ice cream cake recipe from Taste of Home.
I couldn’t believe my eyes when I saw this month’s challenge – not only were we making Swiss rolls (which turned out to be quite a challenge in and of itself), but we were also making two flavors of homemade ice cream and a hot fudge sauce – and then combining them all into one large, multi-layered ice cream bombe style dessert!
Sunita provided recipes for a chocolate Swiss roll with a vanilla cream filling, along with recipes for vanilla and chocolate ice creams (made without an ice cream maker) and a hot fudge sauce. We were allowed to follow the given recipes or we could change the flavor of the Swiss roll, filling, or ice creams. What was mandatory was that all the components had to be made from scratch and the final dessert had to be set in a bowl/pan in the following order – Swiss roll first, followed by the first ice cream, the fudge topping, and finally the second ice cream.
After spending some time contemplating flavor combinations, I decided to go with a s’mores inspired Swiss roll ice cream cake. I kept with the chocolate Swiss roll, but did a marshmallow cream filling, with a layer of vanilla graham cracker ice cream and a layer of chocolate marshmallow ice cream.
I had really wanted to do a vegan sponge cake, but after two epic failures I reverted back to the original challenge recipe and finally got a Swiss roll that didn’t break into a million pieces after unrolling it. In keeping with the Daring Bakers style of making everything from scratch, I also made the graham crackers and marshmallows included in the two ice cream recipes. If you have never made homemade marshmallows, I highly encourage you to do so. You won’t believe how wonderful and natural they taste; they seriously put store bought marshmallows to shame.
While the process seemed epic, stretching over three days (with many broken Swiss rolls in between), I have to say that I can’t think of a finer reward than finally getting to bite into this dessert! The taste was beyond amazing, and I was quite sad to see the last few bites finished off last night.
You can view the recipes and how to assemble the dessert after the jump.

The April 2010 Daring Bakers’ challenge was hosted by Esther of The Lilac Kitchen. She challenged everyone to make a traditional British pudding using, if possible, a very traditional British ingredient: suet.
I was not familiar with suet upon first reading about the challenge, and after discovering that it was actually the hard but flaky fat found on the inside of a cow or sheep around the kidneys (and that area of the body) I was really worried I may have to sit out my first challenge. Luckily, our host anticipated that not everyone may be comfortable or able to use suet and gave us a lot of leeway in this respect. We were working from the definition of a pudding as any dish cooked in a pudding bowl or pudding cloth normally steamed, boiled but sometimes baked. Some recipes were provided, but really the flavors and fillings were left up to the bakers. In fact, we could even choose to do a savory or sweet pudding. The important part was trying the cooking method, so the puddings had to be steamed.
After looking at dozens of steamed pudding recipes I decided on a vegan, steamed pumpkin-date pudding with liquor sauce from Bryanna Clark Grogan’s website. The steaming process was totally new to me, and I had no idea what to expect. I was really anxious to know if things were working, but since the pudding is wrapped up nice and tight during the steaming process you can’t really see what’s going on.

After a one and half hour steaming period I unwrapped the pudding. I really felt like a kid on Christmas morning; I was so excited to find out what everything looked like inside the steamer.

When I was able to remove the pudding from the bowl with ease I literally squealed in delight and went running through the house with it to show my husband. We were both so impressed with the results.The pudding was absolutely delicious and incredibly moist. I plated it with a rum liquor sauce that really knocked it out of the park.


The pudding comes together so easily and the majority of the time is completely hands off. I really enjoyed this challenge and learning this new cooking technique. So much so, that I made two more puddings!

The 2010 March Daring Baker’s challenge was hosted by Jennifer of Chocolate Shavings. She chose Orange Tian as the challenge for this month, a dessert based on a recipe from Alain Ducasse’s Cooking School in Paris.
This month’s challenge was a citrus-dessert known as the Orange Tian. The dessert is made up of a few different layers: the bottom layer is a pate sablee that has been spread with orange marmalade, a whipped cream topping rounds out the middle layer, and topping it all off is fresh orange segments drizzled with an orange caramel sauce. You actually build the dessert upside down in a mold, and then unmold it to have the orange segments neatly arranged on top. The dessert was absolutely delicious, and a wonderful way to usher in the new spring season.
Thank you Jennifer for hosting a great challenge!
There were some variations allowed in this challenge. First, we could choose to serve the dessert in a “family-style” version or in individual portions. We could also choose to use our favorite pate sablee recipe. The addition of different flavorings to the whipped cream were allowed, as well as utilizing different types of citrus in the dessert. However, we had to make the pate sablee dough, whipped cream, caramel sauce, citrus segments, and marmalade.
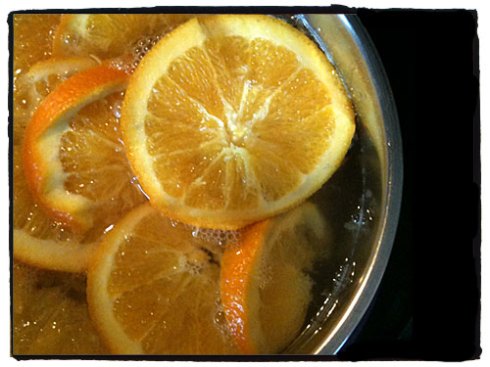
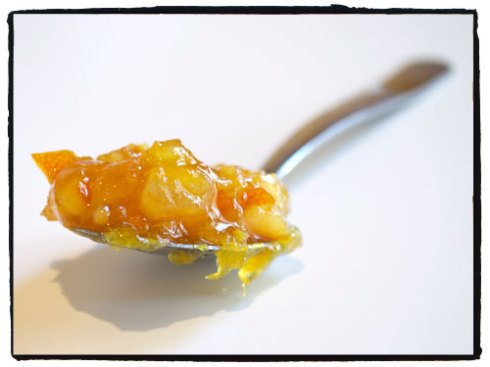
As you can imagine, there were a lot of steps involved in making this dessert, but several of them can be made ahead in stages. I made my dessert over a total of 3 days. On the first day, I started by making the orange marmalade. This was a first for me, and a really exciting part of the challenge. I stuck to the orange marmalade recipe provided in the challenge. I would never think of myself as a marmalade fan, but this recipe yielded delicious results. I have been spooning this stuff on everything!
On day 2 I tackled the orange segments and caramel sauce. The orange segments need to soak overnight in the caramel sauce so this step must be done the day before you plan to complete the desserts. I chose to use a mixture of orange and tangelo segments as well a combination of orange and tangelo juice in the caramel. The homemade caramel sauce was another first for me. I’m not quite sure it was the right consistency; it seemed a bit more “watery” then what I would typically think of as caramel sauce, but in the end it seemed to work out fine. The leftovers have even gotten good use jazzing up late night bowls of ice cream.
Day 3 was started by making the pate sablee dough. After the dough had been chilled, baked, and then cooled, I moved on to the whipped topping. I decided to add about 1 teaspoon of cinnamon to the whipped topping mix, and I am so glad I went with that choice. It really added a great flavor to the overall dessert. Next I assembled the desserts in their molds and popped them in the freezer so they could start to set up. While the desserts were setting up I reheated the leftover orange-tangelo caramel sauce so it would be ready to spoon over the finished dessert. I must say it was quite a treat to unmold these little beauties – they have quite an impressive appearance!

You can check out all of the recipes and instructions for this month’s Daring Baker’s Challenge after the jump.
The February 2010 Daring Bakers’ challenge was hosted by Aparna of My Diverse Kitchen and Deeba of Passionate About Baking. They chose Tiramisu as the challenge for the month. Their challenge recipe is based on recipes from The Washington Post, Cordon Bleu at Home and Baking Obsession.
RECIPE SOURCE:
Mascarpone Cheese – Vera’s Recipe (Baking Obsession) for Homemade Mascarpone Cheese.
Savoiardi/ Ladyfinger Biscuits – Recipe from Cordon Bleu At Home
Tiramisu – Carminantonio’s Tiramisu from The Washington Post, July 11 2007
Thank you Aparna and Deeba for a wonderful challenge!

This month’s challenge was to make the Italian dessert tiramisu. In true Daring Bakers style, the entire tiramisu was to be made from scratch – this included baking our own ladyfingers and making our own mascarpone cheese and zabaglione (an egg custard). We were allowed to be creative with the tiramisu in terms of flavors, decorations, and how we served it, as long as it contained the mascarpone cheese and ladyfingers we made.
A classic tiramisu is made by alternating layers of espresso soaked ladyfinger biscuits and a cream made from mascarpone cheese and zabaglione. I went the nontraditional route and attempted to do a vegan version without any alcohol or coffee. As an alternative to the espresso, I soaked my ladyfinger biscuits in a mixed berry concentrate. For some extra flair I also added some almond butter and honey to my mascarpone layer. After assembling the tiramisu, I topped it off with a dusting of cinnamon and nutmeg and piled on a layer of almond slices for the finishing touch.
I’d like to pretend that my tiramisu came out perfect on the first try, but this was actually my second attempt. Let’s just say the first try will go down in cooking history as an “epic fail.” While the second version was still flawed, I am happy that I didn’t throw in the towel and abandon the challenge. Now, not only can I say that I made my first tiramisu, but that I also ate it! 😉


